This post contains affiliate links.
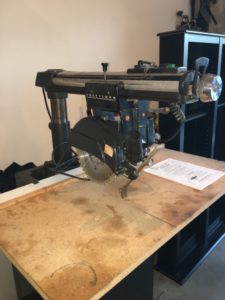
In my last post, I mentioned how much I love my radial arm saw. I love it because it was my grandfather’s, and because it makes for nearly a one-tool shop. It’s so versatile! It’s a crosscut saw, rip saw, miter saw, metal cutting saw, drill press, disc sander, molding cutter, and so many more!
All tools, especially stationary tools, need maintenance – sometimes a quick tune-up, sometimes an extensive overhaul/cleaning. When we moved from California, I had to disassemble the radial arm saw for transport. After we arrived, I took a few partial days to disassemble, clean, and reassemble the radial arm saw. Boy, I should have done that a long time ago! Manualslib is your best friend when you embark on a project like this on a 50+ year old tool.
 Since I already had the carriage off the arm, I started with the base and the arm. I used a wire wheel on my drill to strip the paint off the base and the arbor tools. I masked the name plate, then repainted with matte black spray paint. The support arm was cleaned with a rag and a generous amount of WD-40*. The rail where the carriage rides took quite a while to get clean, using the same rag and WD-40 combination.
The carriage took quite a while. I’m confident there was 50 years of gunk and sawdust accumulated on the top of the mechanism. It was fun to think of what Grandpa was doing to generate that dust. It’s amazing what a can of WD-40, a rag, and a wire brush can do. Before I moved it cross-country and started this process, the most difficult part to adjust was the left/right tilt. The spring-loaded release was really hard to move in order to make adjustments. After I removed the spring clip and the pin, cleaned them really well, and reinstalled them, it works so much better! I was also able to take the opportunity to tighten up the yoke clamp assembly.
My second-best friends throughout the rebuild were my camera and a method to lay out parts in an organized manner. If I removed a bolt from the left rear of the carriage, I placed it on the assembly board in the left rear. Taking a lot of pictures along the way helped me remember how various parts went back together, especially when I was reconnecting power.
A rebuild project like this doesn’t have to be scary. Take it one step at a time, clean each part as you remove it, take lots of pictures, and be organized about where you place parts for reassembly.
*Full disclosure: some links on our site are affiliate links and we may receive a small commission.