This post contains affiliate links.
Now that everything has been taken apart, inspected, and cleaned, it’s time to put my ShopSmith Mark V back together. This reassembly step should be pretty easy.
The Frame
The frame is pretty much all assembled since I didn’t take it all the way apart, but deserves a little attention just to make sure. Went through the set screws on the bench tubes and caster assemblies with my ShopSmith toolbox (5/32 hex wrench), as well as the pivoting end of the way tubes. I left the free/latching end cap off because I need to reinstall the headstock before I secure that part.
The Carriage
I made sure the lock wedges were loosened up on the carriage, then slid it onto the way tubes. I slid it to the middle of the way tubes, then checked the locking mechanism to be sure it was solid. After that, I loosened it up and slid it down to the pivot end. I then slid the rubber spacer onto the front tube.
The Headstock
First, I reinstalled the idler with it’s sheaves. Didn’t try to adjust belt tension or anything, just put it back in. Looped the poly-V belt over it and the drive pulley. I reinstalled the motor in its pan with its four mounting screws, then installed the motor and pan back onto the headstock. After securing the five screws that hold the motor pan in place, I went ahead and slid the headstock onto the way tubes, checking that the locking wedges still work. Slid the dust cover on the way tubes, but didn’t attach to the headstock. Now I can reinstall the end-cap and latch on the way tubes.
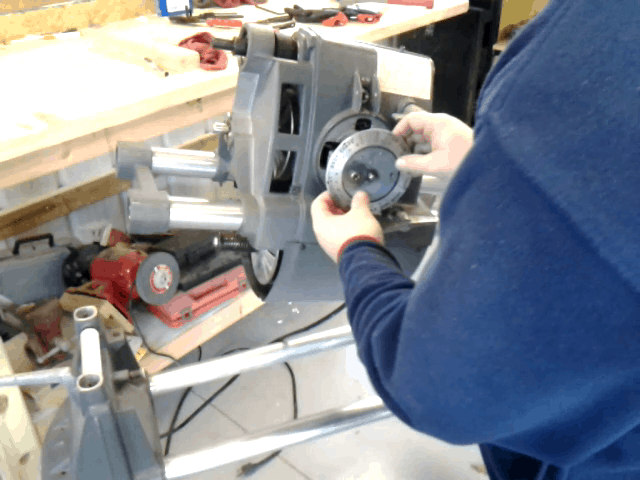
Next up is to reassemble the insides of the headstock – the speed control and the quill. With the speed ring held in place, I slipped the pork chop (very technical term) into place, attached the clip that connects it to the control sheaves, then screwed it into place. Once I align the new speed control handle, I’m almost there!
The Quill
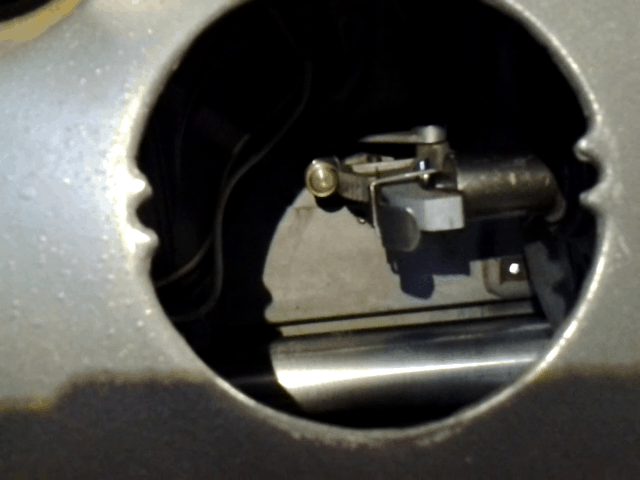
Making sure that the set screw is backed out, I insert the quill with the keyway up. The big challenge here is to make sure the quill splines engage with the splines on the shaft. Holding the quill in place, I grab the far end of the drive shaft and twist it slowly with my left hand, applying a little bit of inward pressure on the quill with my right. Once the quill goes in another inch, Bob’s yer uncle! Tighten down the set screw on top – not too tight, though! The quill still needs to slide back and forth freely.
Once i slide the dust cover on and screwed it into place, it looks like a ShopSmith again! Now all that’s left is to align and adjust everything.